
Step 2. VOD / MPS Basic Settings
1. VOD Activation
If you only use MPS, please skip to the 5. MPS Activation section.
Not logged in yet?
Follow Step 1. Login and API Key Issuance to log in to your Tencent Cloud account (and complete identity verification) first, then continue with the steps below.
Open the console Overview page
After logging in you land on the console Overview page by default. You can also open it directly at https://console.tencentcloud.com/.
Search for VOD
Type
VODinto the search box on the Overview page, then click Video on Demand in the dropdown results.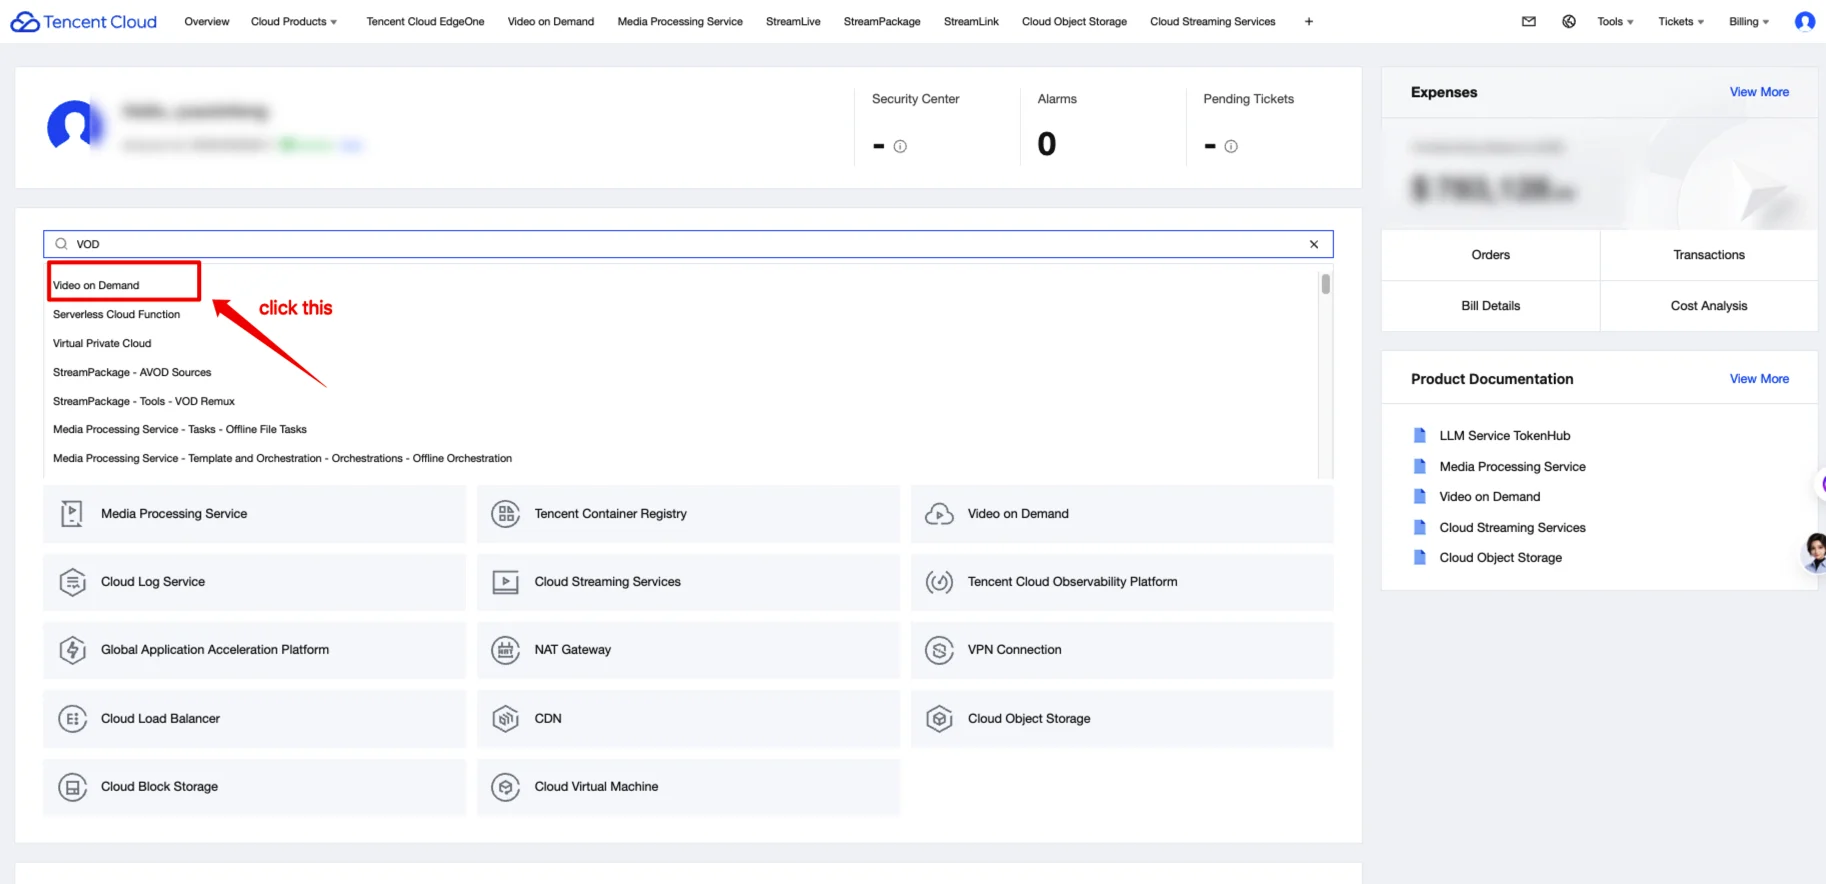
Activate the VOD service
On the VOD product page (Enable Service), tick the agreement checkbox (Agree to the Tencent Cloud Service Protocol…), then click Immediately enable to activate the service.
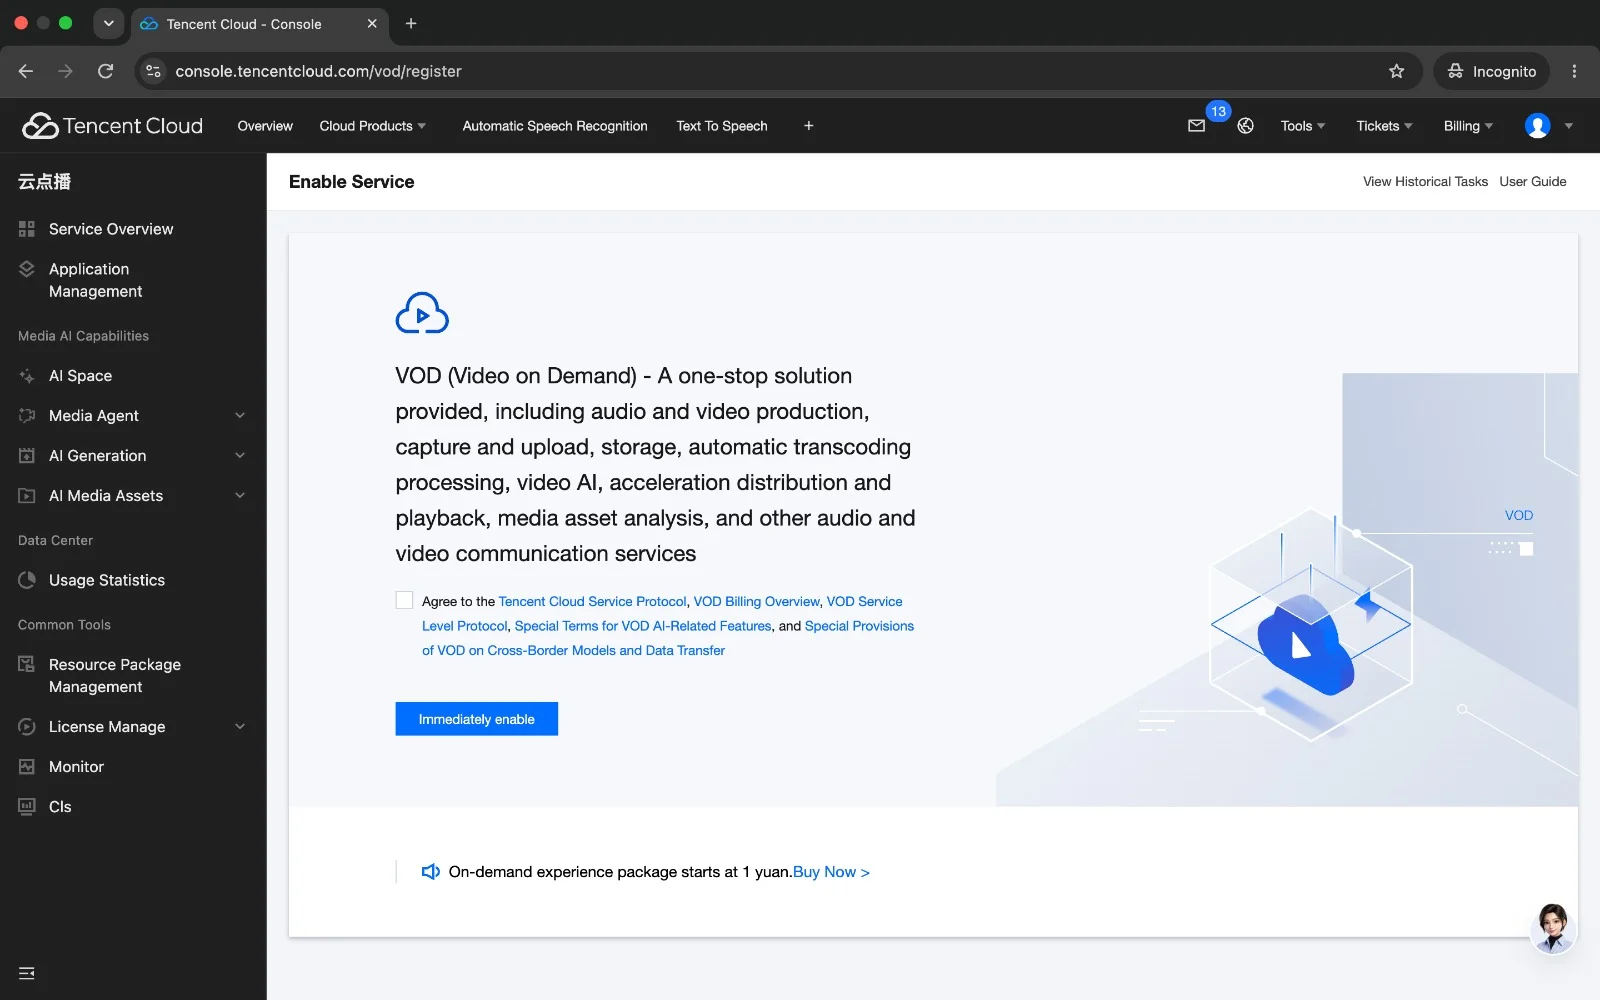
Once activation is complete, continue with "2. Create a VOD Application" below. If you use MPS, check the MPS activation procedure below separately.
2. Create a VOD Application
Once activation is complete, you now need to create an Application.
- Go to the Application Management page in the VOD Console >.
- Click Create Application and enter a name and description to complete creation.
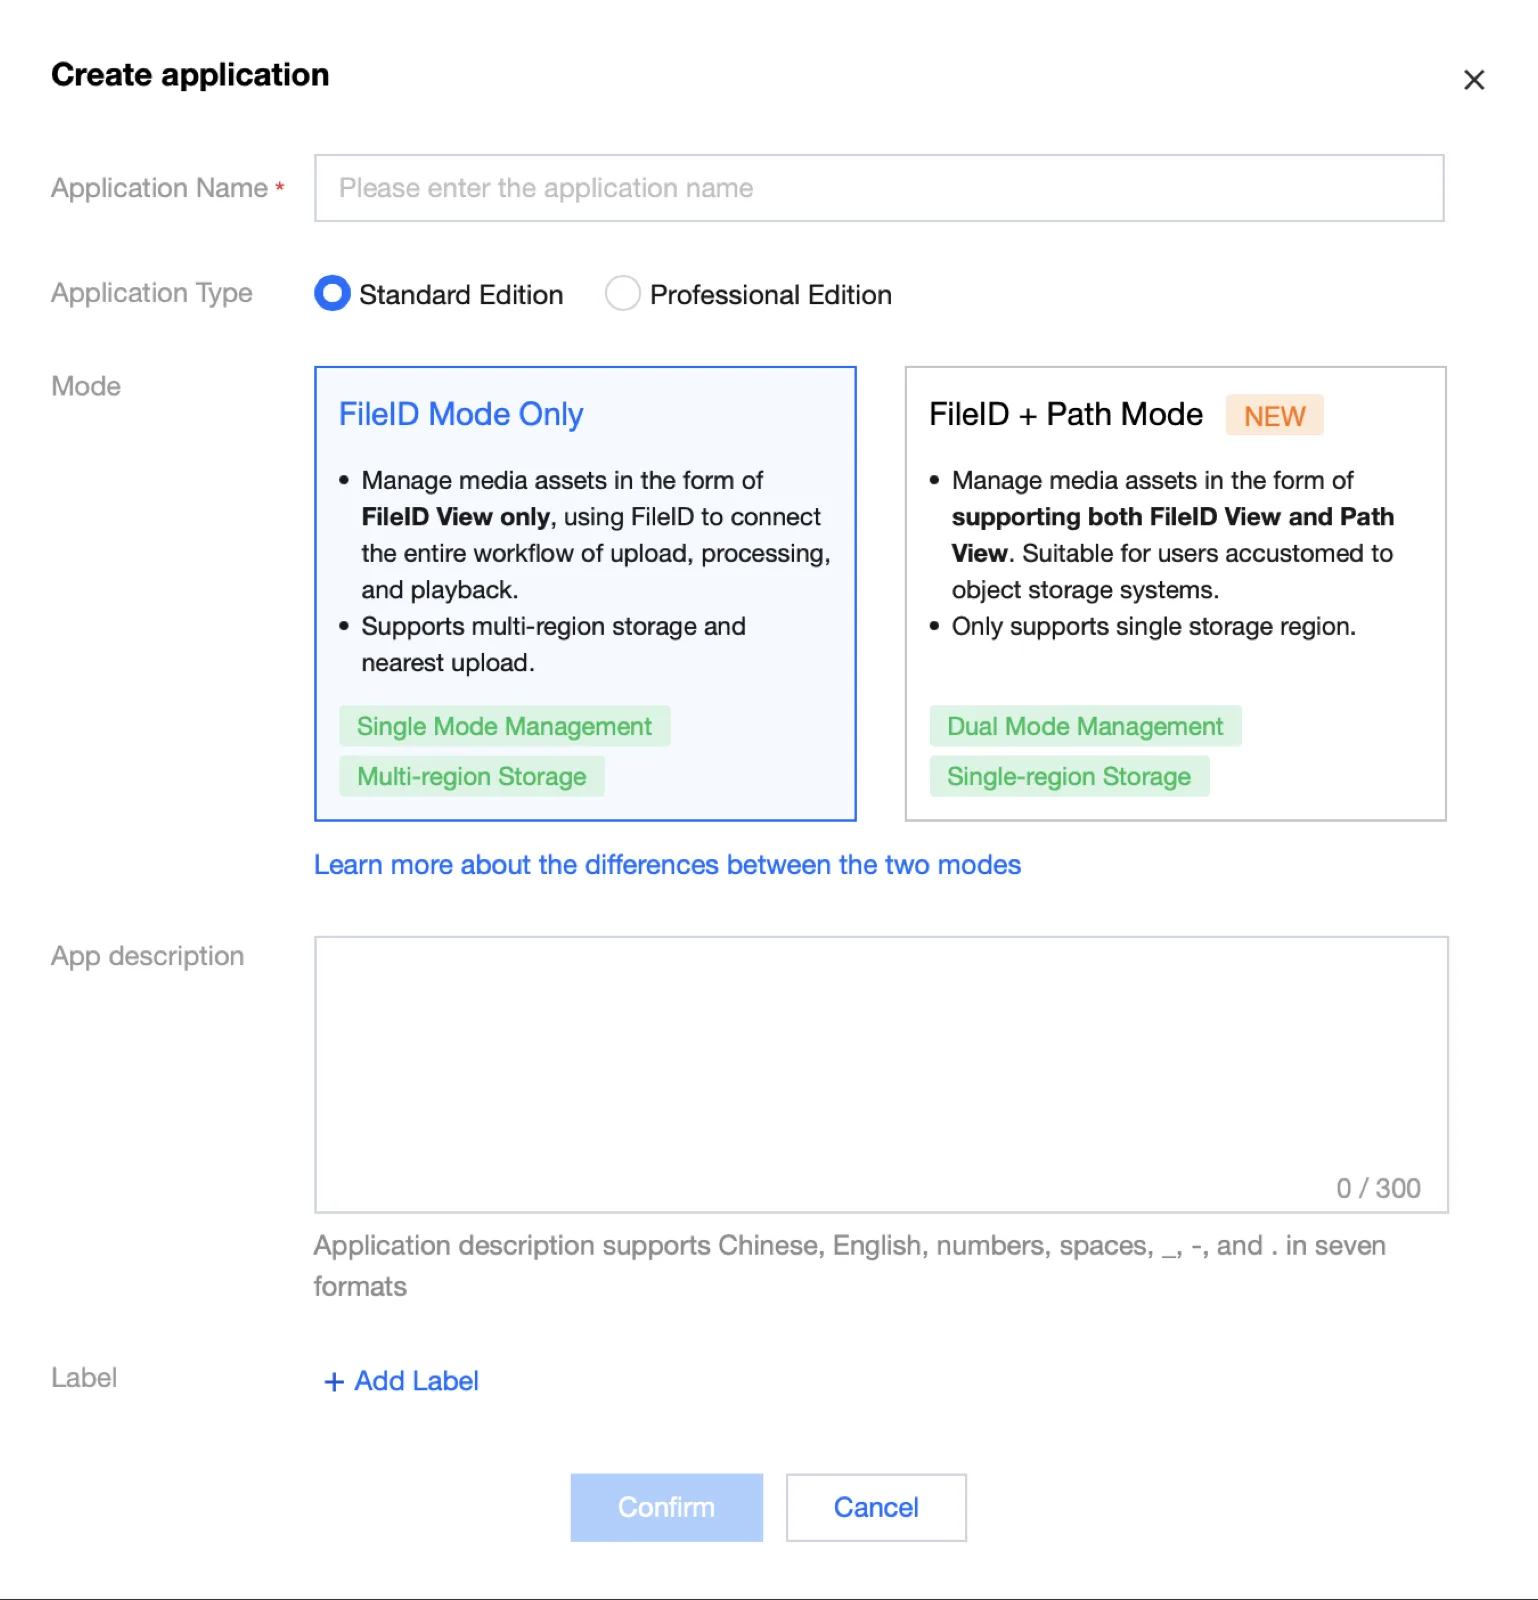
Application Type : In general, if you want AI content generation, select Standard Edition.
Mode
- FileID Mode Only : Only the file ID is displayed. Use this ID to connect to every workflow, from upload and processing to playback. Multi-region storage is supported.
- FileID + Path Mode : Both the file ID and the path are displayed. Suitable for customizing the storage system. Only one storage region is supported.
After the Application is created, the system automatically assigns SubAppId. All subsequent media uploads, processing, and AI calls are based on this ID.
It is recommended to create a separate Application for each business so that permission management and billing management can be handled more easily.
3. Media Upload
Media to be entered as a FileId is uploaded to the Application. Text generation or entering an externally accessible URL does not require uploading in advance.
- On the Application Management page, select the Application you want.
- Depending on the content type you want, click the Audio/Video Management or Image Management page.
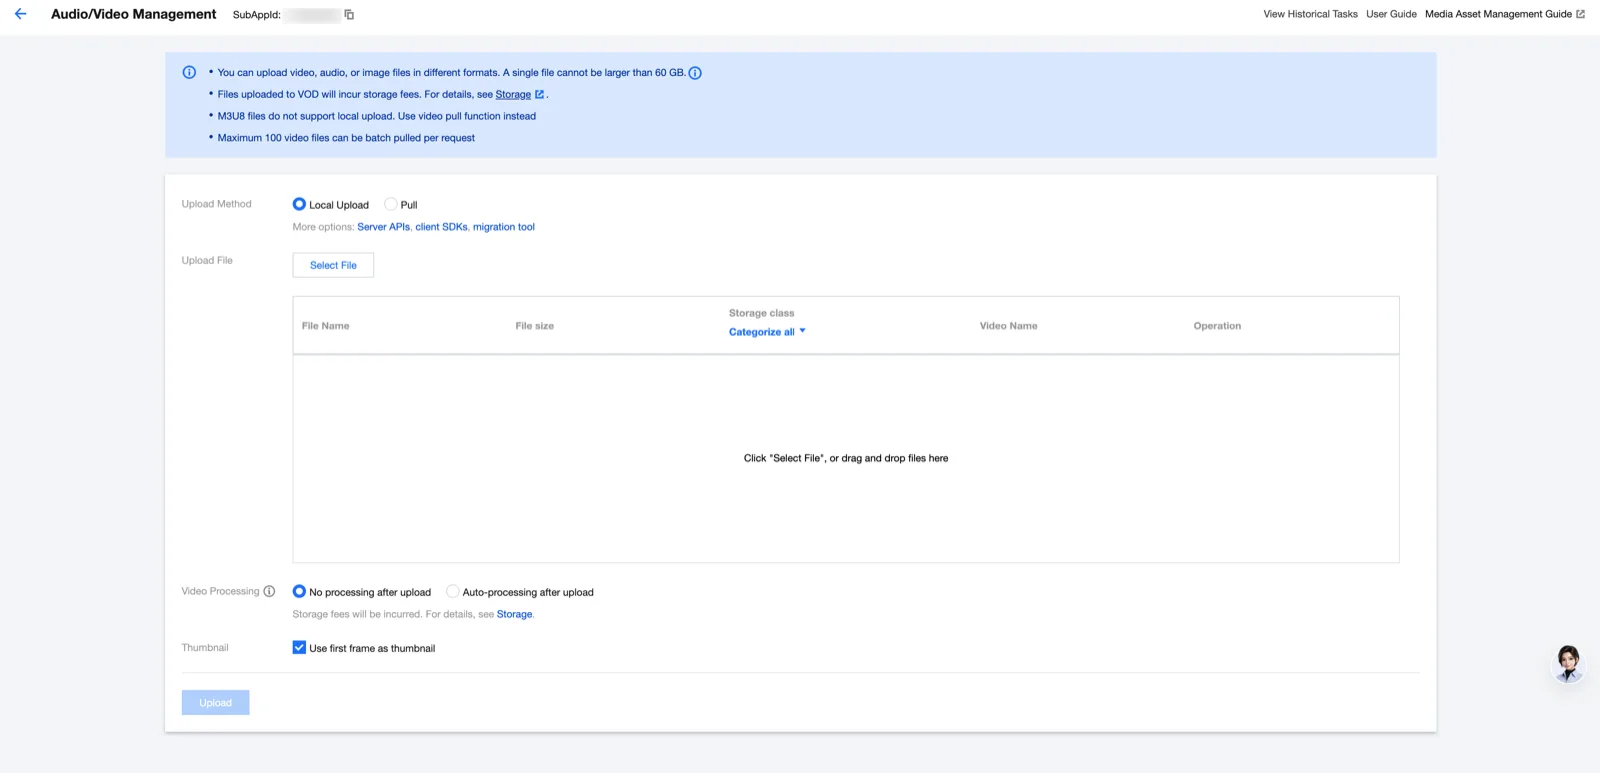
- Click the Upload button to upload the content you want to process. Select "Local Upload" as the upload method and then upload the local file.
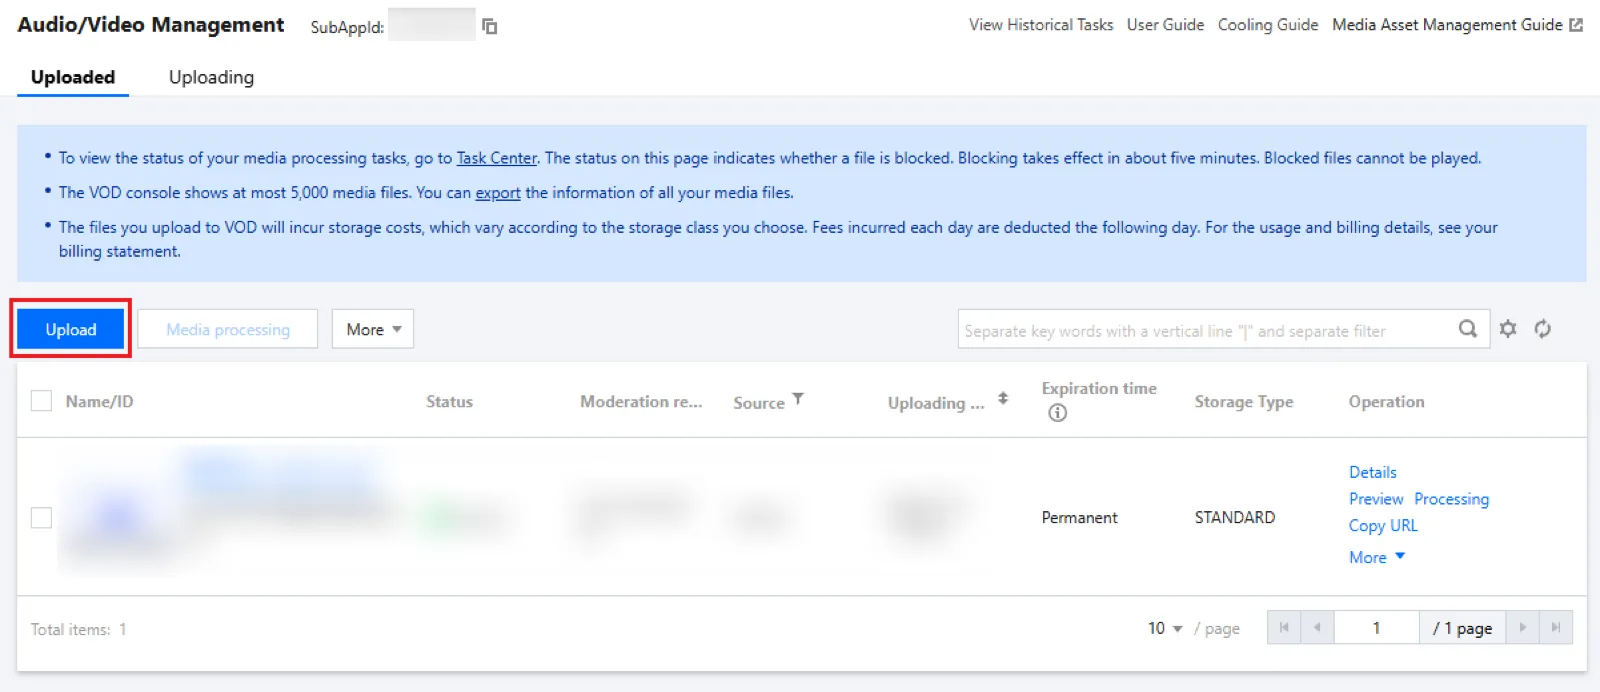
- For content processing, select "No processing after upload".
4. Granting VOD Sub-Account Permissions
Grant VOD operation permissions to a sub-account with the root account.
To use the VOD service with a sub-account, you must log in with the root account and grant permissions to the sub-account.
1) Create a New Sub-Account with Full Access to VOD
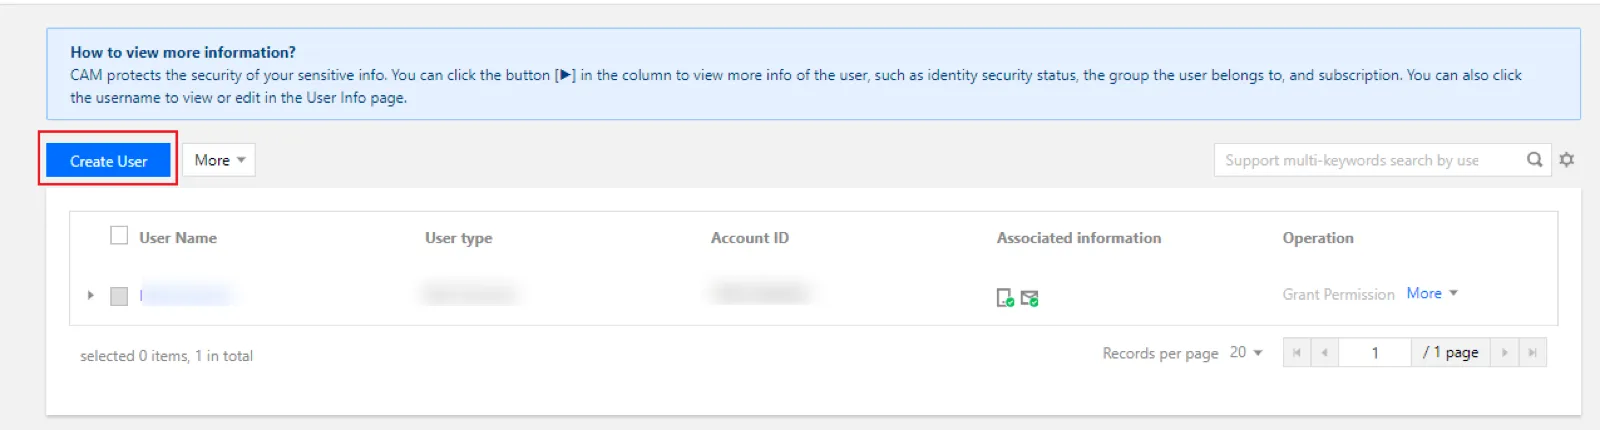
- In the CAM Console, log in with the root account, go to the User List page, and then click Create User.
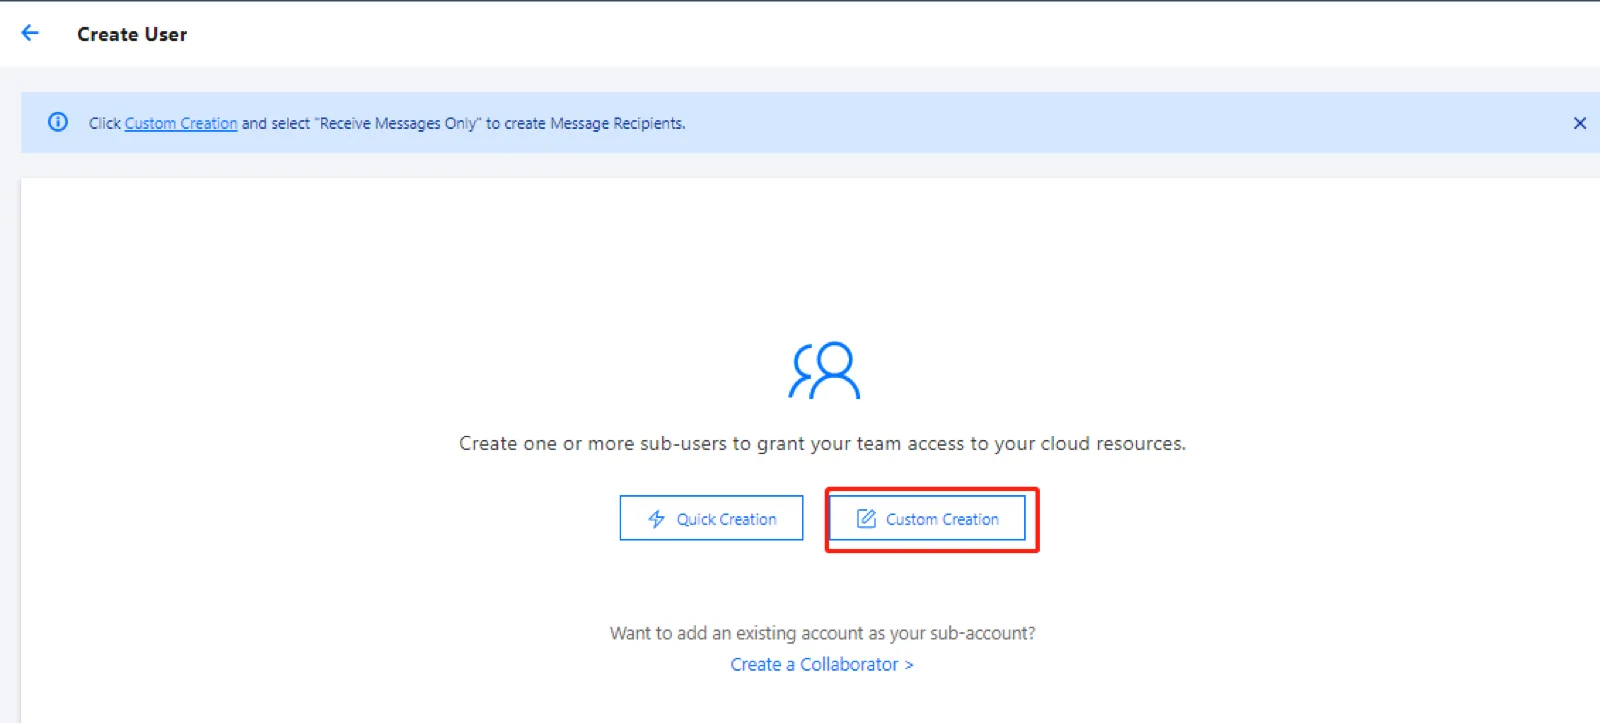
- On the Create User page, select Custom Creation.
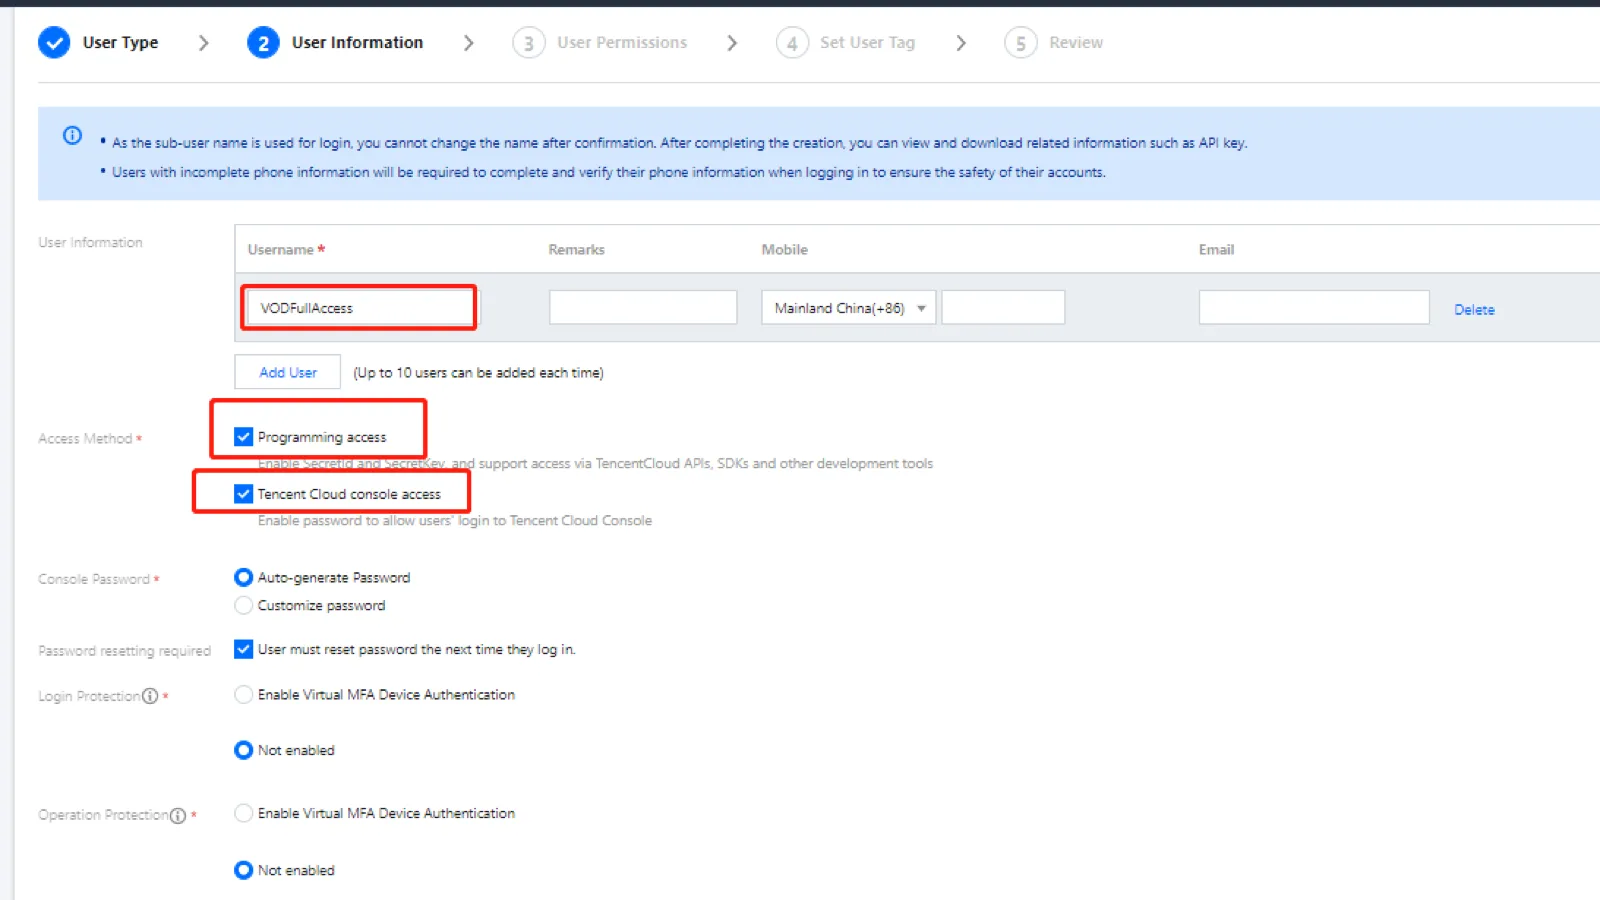
- Click Next and enter the user information.
- Enter a user name, and select Programming Access and Tencent Cloud Console Access. Select other options together if needed.
- Click Next and complete the verification according to the instructions.
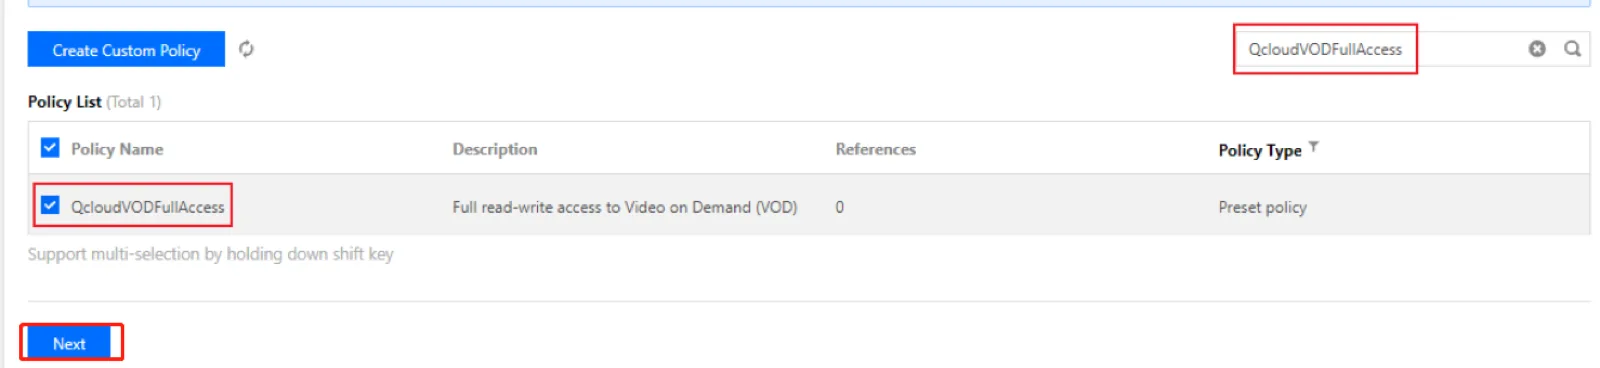
- Set the user permissions.
- Search for and select the preset policy QcloudVODFullAccess.
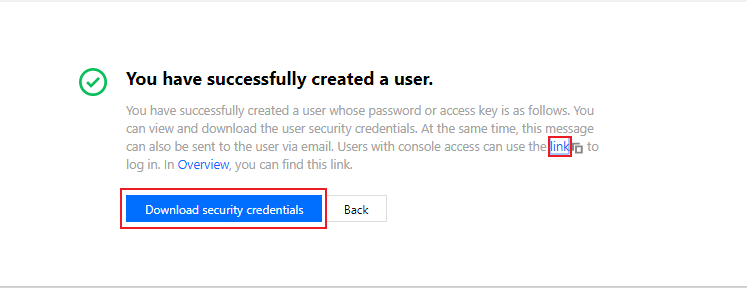
- In the "Review Info and Permission" section, press Complete. Once the sub-account is successfully created, download the login link and Security Credentials as shown and keep them safe.
2) Grant Full Access to an Existing Sub-Account
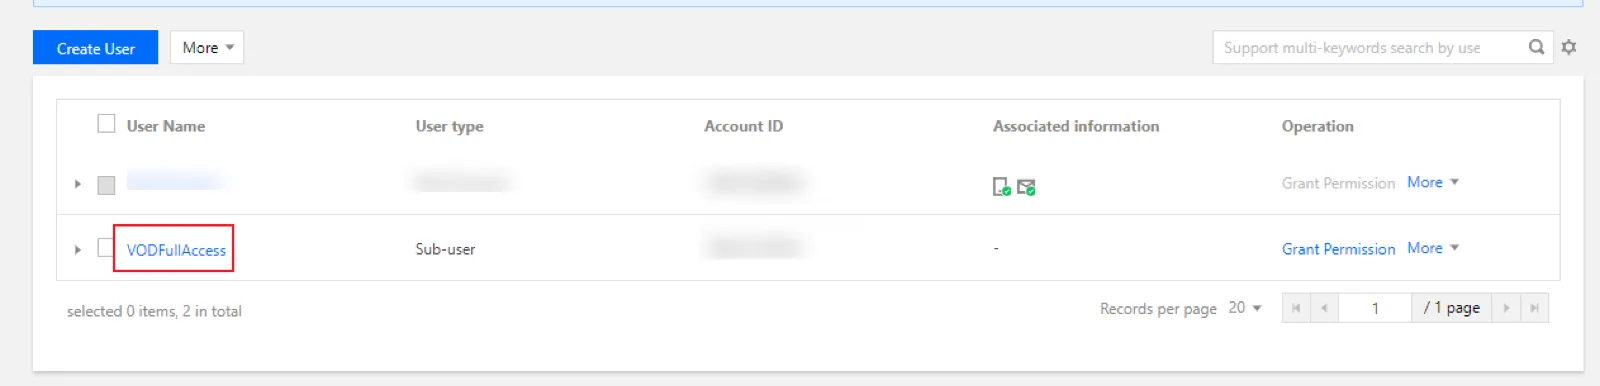
- Log in with the root account, go to the CAM Console page, and in User List select the sub-account you want to grant permissions to.
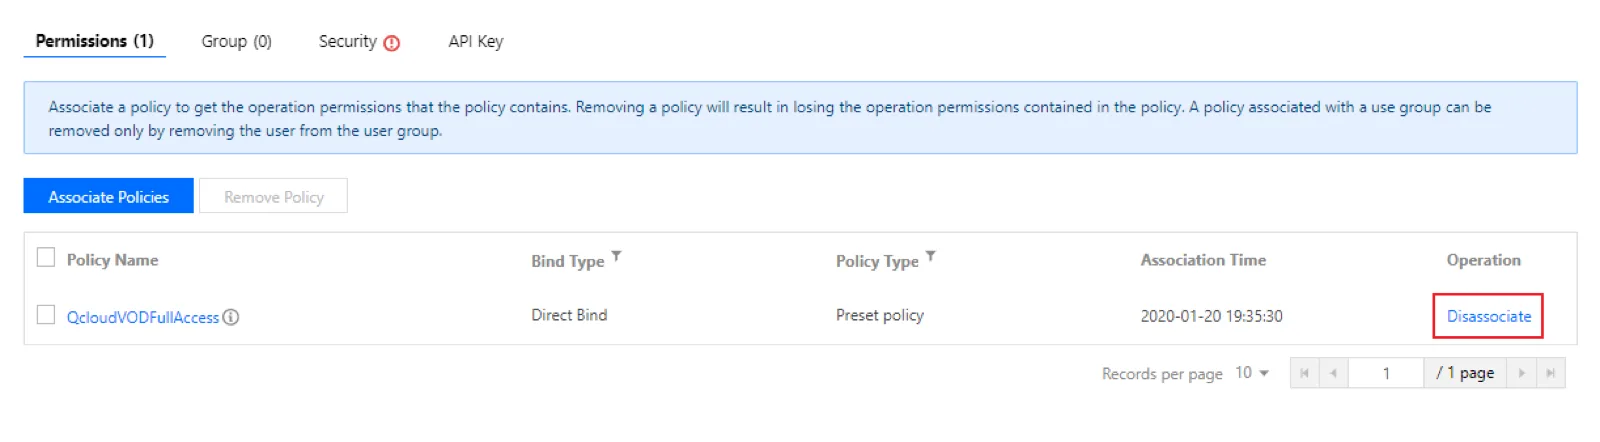
- On the User Detail page, click the button in the Permission section, find the preset policy QcloudVODFullAccess, and run the policy association (Associate/Authorize). Do not select
Disassociate, because it is a permission release.
5. MPS Activation
Prerequisites
Sign Up and Log In
- Register a Tencent Cloud account and complete real-name authentication.
- Log in to the official Tencent Cloud website, go to the MPS service page, and press Get Started to enter the console and activate the service.
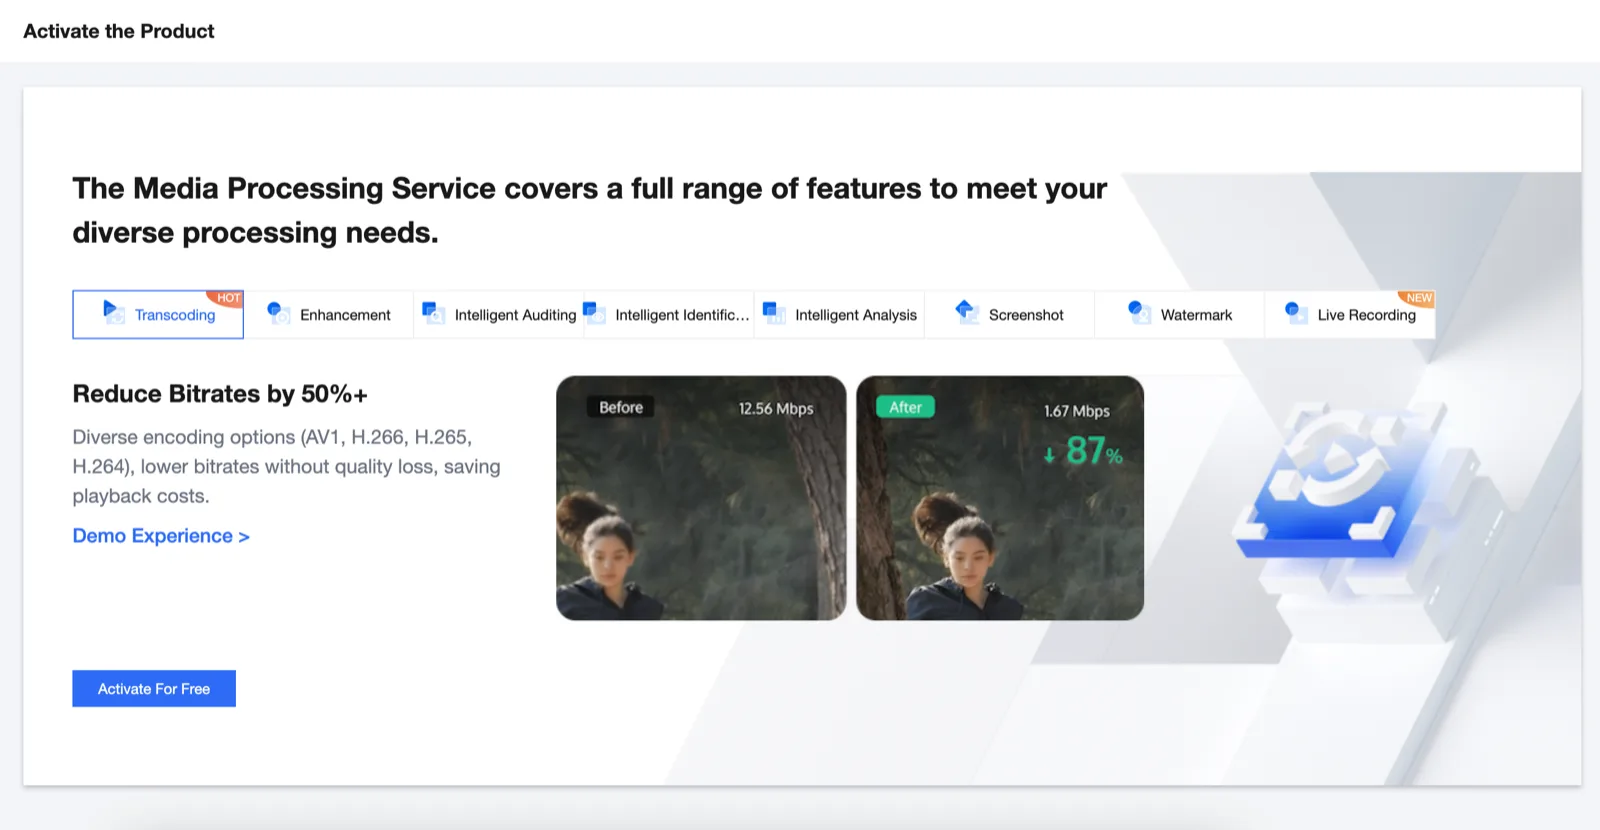
6. MPS - File Source Authentication
If your main purpose is to generate AI content and check the results using the console, you can skip this section.
MPS supports four types of file sources: COS (Cloud Object Storage), VOD Pro (Video on Demand Pro), Amazon S3 (Amazon Simple Storage Service), and URL address
- COS : You must complete COS authentication so that MPS can perform read and write operations (download, transcoding, upload, etc.) on files in the COS bucket.
- VOD Pro : You must complete VOD service role permission authentication so that MPS can perform read and write operations (download, transcoding, upload, etc.) on files in the VOD Pro Application.
- Amazon S3 : You can skip the role permission, but you must complete the integration of AWS and MPS.
- URL address : You must use a publicly accessible URL that can be downloaded directly.
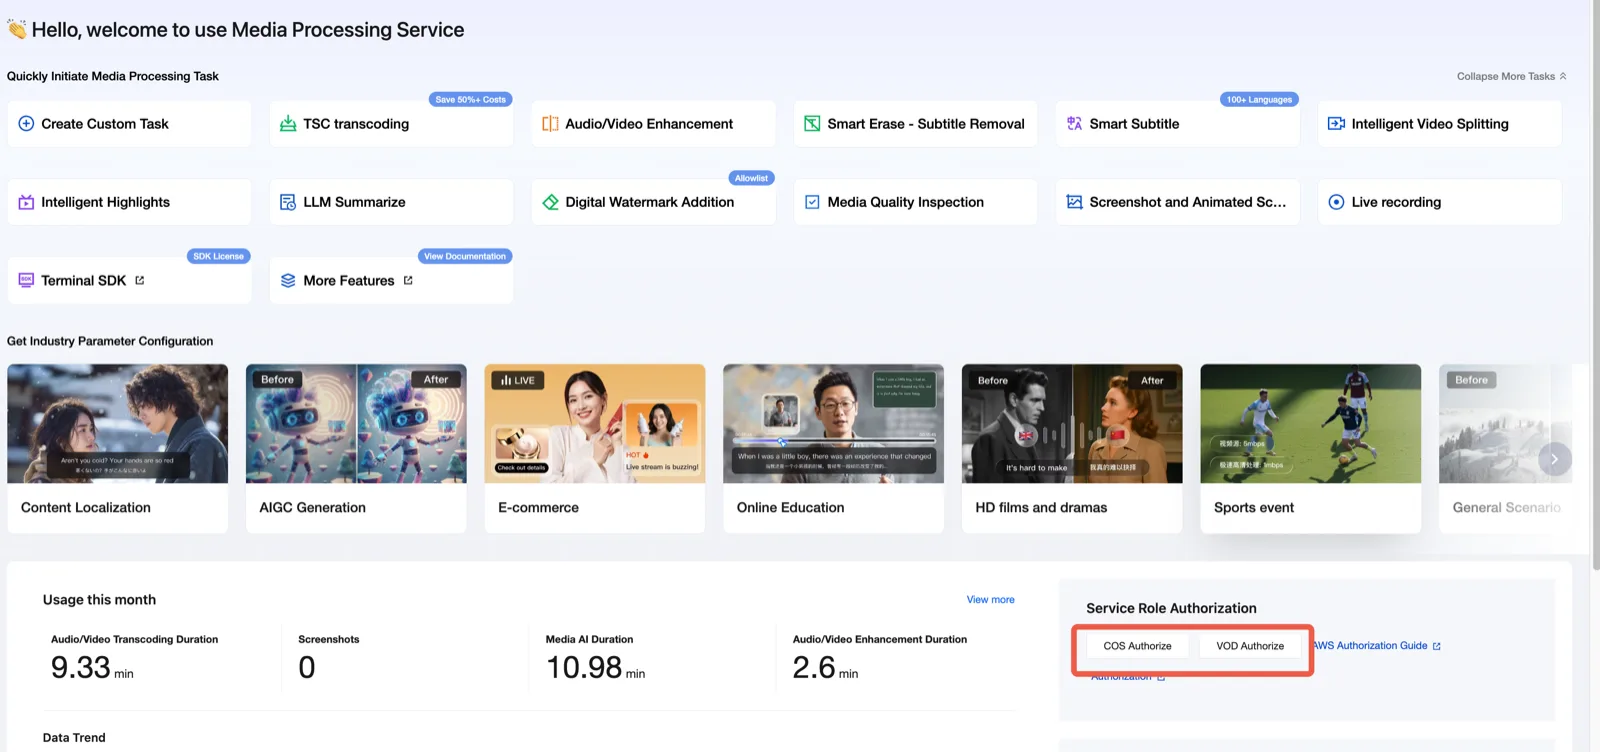
7. Granting MPS Sub-Account Permissions
Grant MPS Read / Write permissions to a sub-account with the root account.
To use the MPS service with a sub-account, you must log in with the root account and grant permissions to the sub-account.
- Log in with the root account.
- Go to Cloud Access Management under the root account, then find the sub-account that needs to use MPS in the user list and click "Authorize".
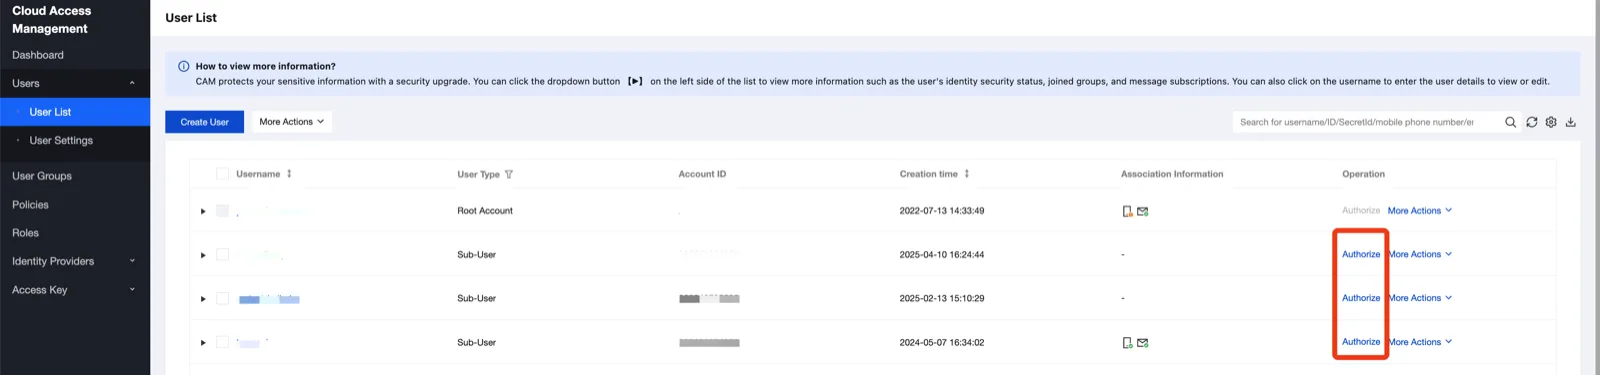
- Search for "QcloudMPSFullAccess" and grant the QcloudMPSFullAccess preset policy to the sub-account.
If you want to grant permissions in a way other than this most recommended method, visit the FAQs page to see various approaches.